
How To Use De'Longhi Water Filter
Share
Using a De'Longhi water filter in your De'Longhi coffee machine is a straightforward process that can improve your coffee’s taste while extending the machine’s life by reducing mineral buildup. Here’s a step-by-step guide on how to install and use the De'Longhi water filter.
Step 1: Prepare the Water Filter
- Unpack the Water Filter: Start by unwrapping the new De'Longhi water filter. Check that it is compatible with your model; these filters are generally designed for most De'Longhi machines.
- Soak the Filter: Immerse the filter in a container of fresh, cold water for about 5 minutes. This step helps eliminate any loose particles in the filter and prevents air bubbles from disrupting water flow through the filter.
- Rinse the Filter: After soaking, run fresh water through the top of the filter to wash away any excess carbon dust, ensuring the filter is ready for installation.
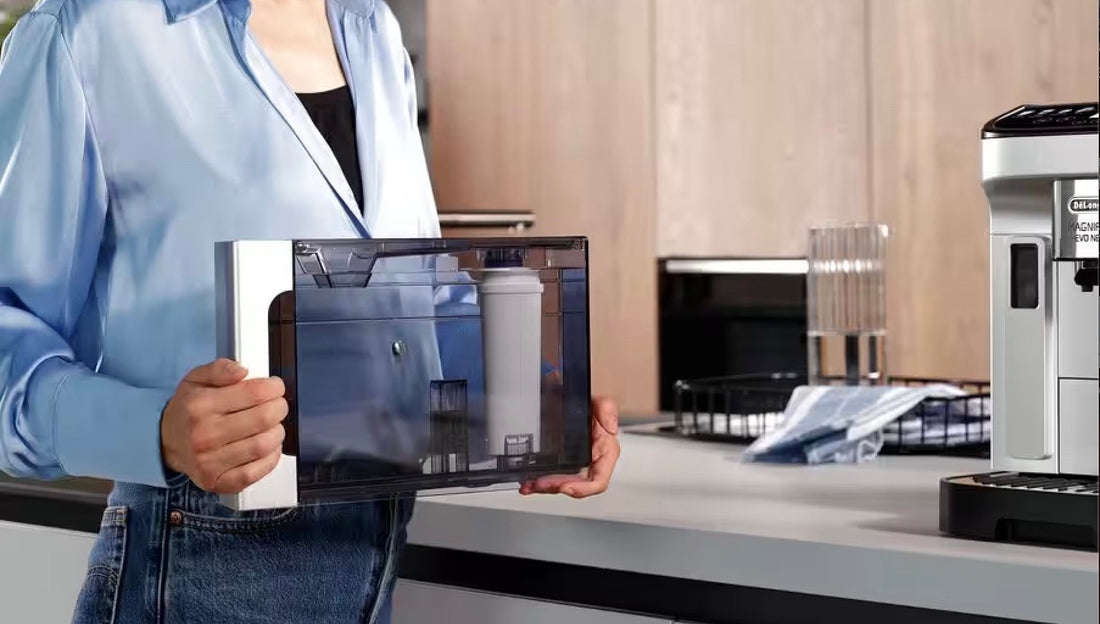
Step 2: Install the Filter in the Water Tank
- Remove the Water Tank: Take the water tank out of your coffee machine. Make sure it’s empty and clean before proceeding.
- Insert the Filter: Place the water filter into its slot inside the tank, pressing firmly to secure it at the bottom of the tank. In many models, you’ll notice a small hook or clip that holds the filter in place.
- Set the Date Indicator: Many De'Longhi filters have a built-in date indicator. Set the current month on the indicator, which will help remind you when the filter needs to be replaced (typically after two months or about 50 liters of water).
Step 3: Prime the Filter
- Fill the Water Tank: Fill the tank with fresh water after securing the filter. Attach the tank back into the machine, making sure it’s locked in place.
- Run a Rinse Cycle: Turn on the machine and run a rinse cycle (without coffee grounds or pods). This will allow water to flow through the new filter, ensuring it is primed and ready for use. Depending on your model, you may have a dedicated “Rinse” button or need to manually run a water cycle to complete this step.
Step 4: Adjust Settings (if necessary)
- Activate the Filter Option: On some De'Longhi machines, there’s an option in the settings to activate the water filter. Access your machine’s menu (typically under “Settings” or “Maintenance”) and select the option to turn on the water filter setting, so the machine can track filter use.
- Confirm Filter Activation: After enabling the water filter setting, the machine may run a final rinse or calibration cycle. Allow this to finish to ensure the filter is fully operational.
Step 5: Maintenance and Replacement
- Monitor Filter Usage: The De'Longhi water filter should be replaced every 2 months or after approximately 50 liters of water use. Check the date indicator regularly to stay on schedule.
- Regular Descaling: While the filter reduces mineral buildup, it’s still important to descale your machine every few months. The frequency of descaling can be reduced but not eliminated by using a water filter.
Step 6: Enjoy Better Tasting Coffee
With the filter installed, your De'Longhi machine is ready to produce cleaner, better-tasting coffee. The filter will reduce chlorine, calcium, and impurities, helping protect your machine and ensure the quality of each brew.
By following these steps, you’ll prolong your machine’s life and enhance your coffee’s flavor, thanks to clean, filtered water. Regularly checking and replacing the filter will maximize these benefits.